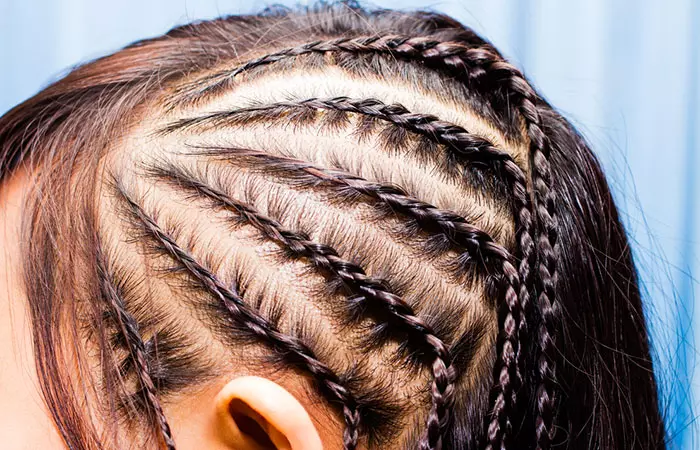
What Are Stitch Braids?
Stitch braids are a unique protective hairstyle that has neat, stitch-like thick or thin lines of hair, achieved by adding braiding hair at frequent, regular intervals. It appears like the extensions have been stitched into the braids. These braids employ organic methods, done by hand, with a lot of product to hold the thick, natural hair and extensions together, and can last for months if maintained properly. Here are a few salient features of stitch braids.
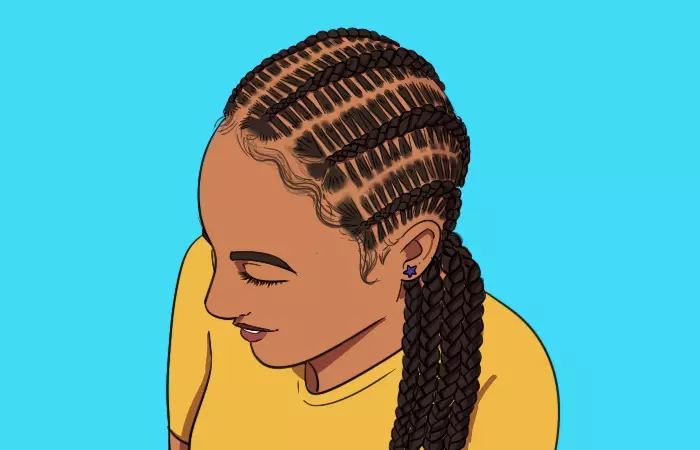
Unique Stitch-In Look: These braids are much like cornrows, except for the distinct, sharp horizontal lines that go straight across each row of braids, dividing individual stitches of the braid, giving it a stitched-in appearance. Versatile Styling: Although the standard braiding style involves straight rows of hair sections, stitch braids are versatile enough for curvy, or creatively shaped braiding lines. The thickness of the braids can be customized as per choice. The braids can also be accessorized using beads and charms that can be easily clipped or removed from the stitches. Hair Protection: It is a protective hairstyle where the braids work to protect the hair shaft from the elements, lock in moisturization, and minimize hair loss. Thus, these braids promote healthy hair growth. Long-Lasting: Stitch braids that are washed and maintained properly can last for several weeks to two months. So, it is a good solution to manage brittle hair types for individuals who cannot make time for regular styling. Suitable For All Hair Types: Although stitch braids are primarily intended to protect natural hair types, they may be worn by people with all kinds of hair textures for a protective look that is also stylish and low-maintenance.
Let us move to the next section and learn how to do stitch braids using traditional techniques.
How To Do Stitch Braids
There are two ways to achieve stitch braids for your hair. They are as follows.
1. The Rubberband Technique
The rubber band technique is a beginner-friendly method of doing stitch braids. As the name suggests, it is done using a lot of rubber bands that hold individual stitches in place. Here is a step-wise tutorial for this technique.
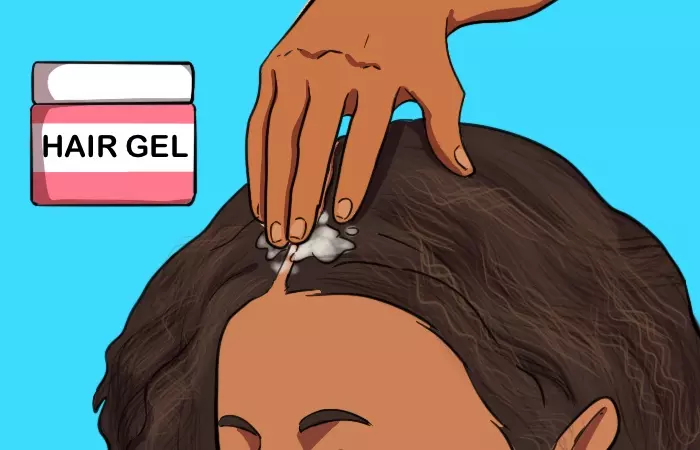
Rat tail comb A big pack of rubber band elastics Hair extension packs (1-3 jumbo packs depending on requirement) Hair-holding product of choice (hair wax, gel, jam, edge control, etc.)
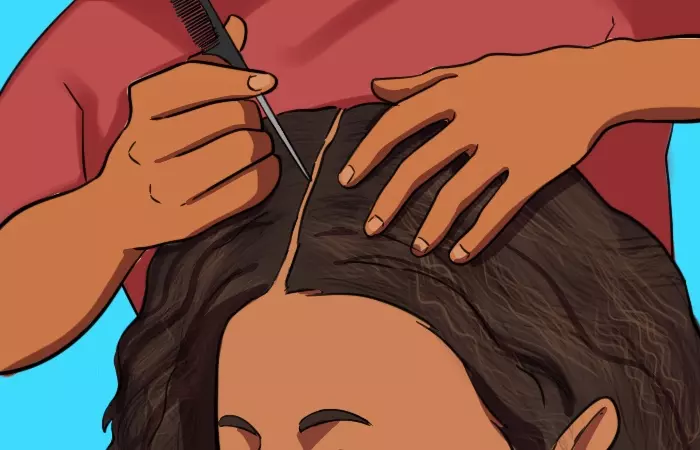
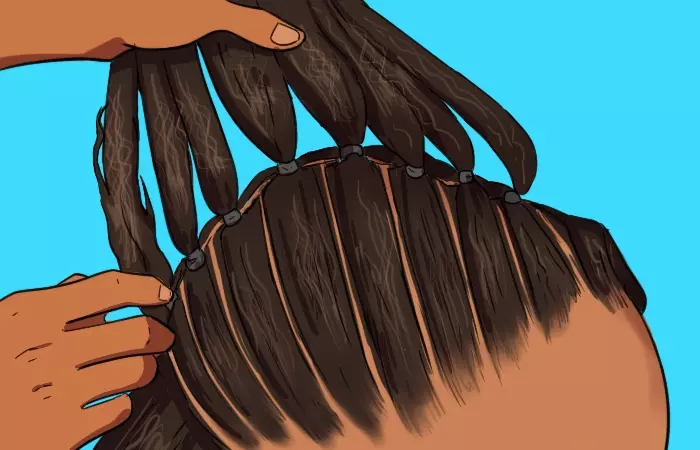
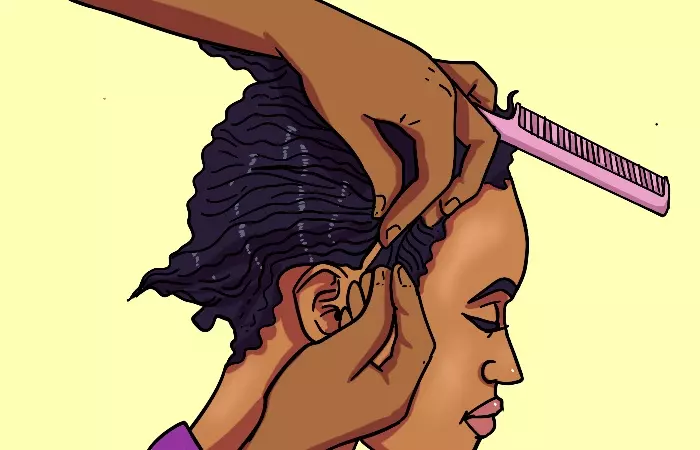
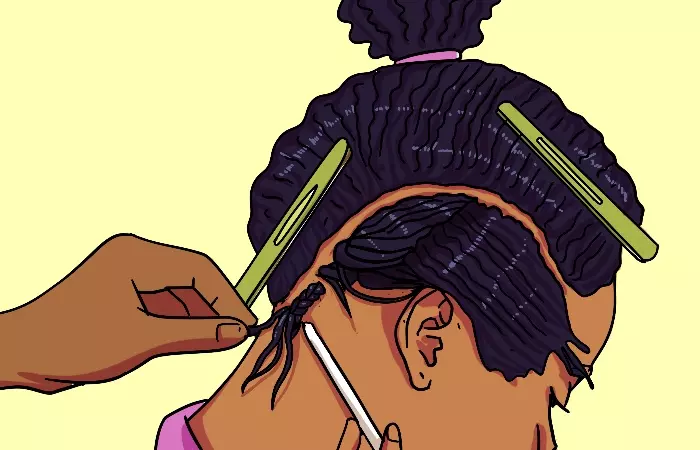
Start with freshly washed hair. Use a rat tail comb, and divide your hair into long sectioned rows from crown to nape. The thickness of the sections can be per your preference. Apply a generous amount of holding product at the roots of each section to make your hair slick, neat, and manageable for styling. Start with one section at a time. Use the rat tail comb to divide a horizontal section of 1-2 cm, across the long section, and secure it with a rubber band. Continue till the nape so you have multiple little ponytail sections from the beginning to the end of the row. Take two horizontal sections at a time, beginning from the crown, and start feeding in the extensions as you braid down the row. Keep adding the following horizontal sections into your stitch braid as you reach them. Secure the braid with another rubber band when you are satisfied with the length. Repeat steps 3 and 4 for the rest of the sectioned rows and your stitch braids are ready! If you are someone with ample experience with protective styles, you need not use all those rubber bands and directly use your hands for the braiding. The following technique tells you how to do stitch braids using a comb and your fingers.
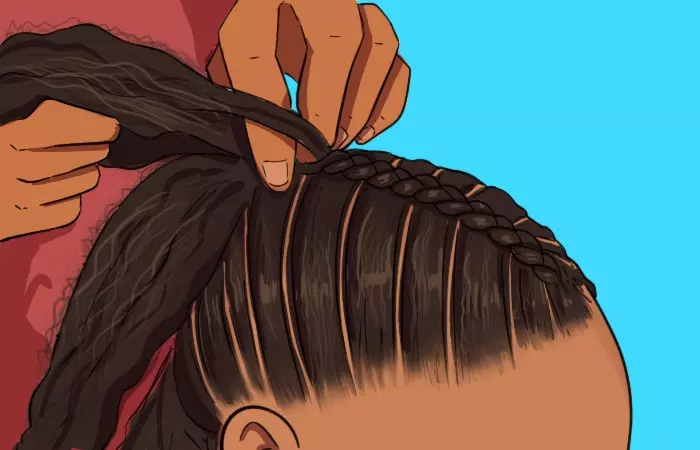
2. The Comb/Finger Technique
This band-less technique is for advanced braiders who can weave protective styles with their hands the traditional way. Here is how it is done.
Rat tail comb Hair extension packs (1-3 jumbo packs depending on requirement) Hair-holding product of choice (hair wax, gel, jam, edge control, etc.)
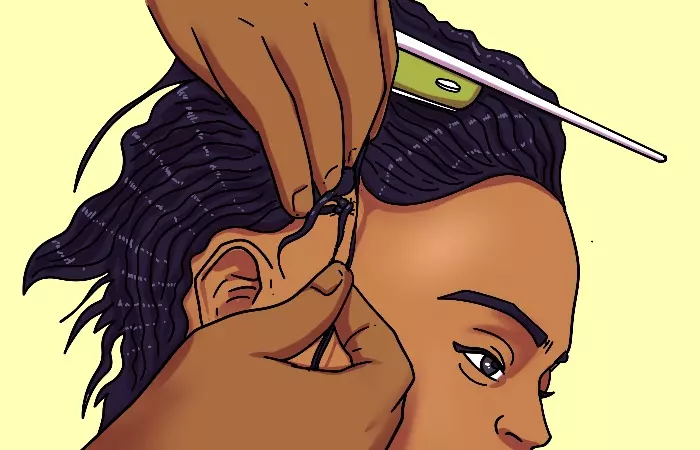
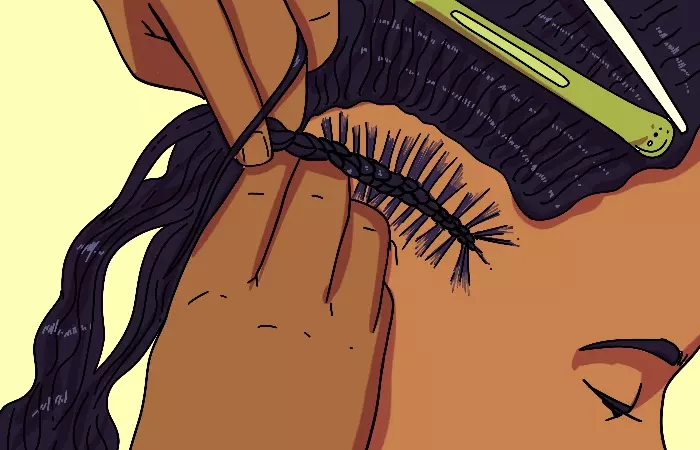
Start with freshly washed, dried, and moisturized hair. Use the rat tail comb to divide long sectioned rows from crown to nape. You may decide how thick you want each section to be. Apply a generous amount of holding product to the roots of each section for ease of managing and styling. Begin with one sectioned row at a time. Use the rat tail comb to create your first horizontal section and make 2-3 braid stitches. Continue making individual horizontal section braids till the nape. Now, add the extension at the first stitch and braid it into your section. Use the comb or your fingers to divide the next horizontal section and stitch it in with the initial braid. Continue dividing horizontal sections and adding them in as you go until you reach your nape. You may continue like a regular braid after you have created the stitches along the scalp and secure them with a rubber band. Repeat steps 3-4 for the rest of the sectioned rows. Your bandless stitch braids are ready to flaunt! Before going through so much effort, you might want to know how long would these braids last. Then check out the next section to know all about it.
How Long Do Stitch Braids Last?
The longevity of this type of braids depends on your hair texture as well as on your maintenance methods. Stitch braids can last up to two months if maintained properly. Additionally, your hair growth rate may also play a role in its longevity. If your hair grows out faster, the braids will loosen quickly and need a touch-up to ensure they are tight and neat again. To make them last long, you need to take care of these braids. Check out the next section to learn more about caring tips.
How Do I Care For My Stitch Braids?
As a protective hairstyle, stitch braids are fairly low maintenance. But that does not mean you can be negligent in caring for it. Here are a few maintenance tips that will ensure the longevity and freshness of your stitch braids for several weeks. You need to shampoo your roots once a week or two to prevent buildup, odor, and itching. Simply use a cloth dipped in diluted shampoo to gently scrub the scalp and roots, without disturbing the braids. Then use another cloth dipped in warm water to clear the suds. Rinse thoroughly and pat dry with a clean microfiber towel to remove excess water. Conditioning is extremely important to avoid overdrying of the scalp after the shampooing. Opt for a lightweight conditioning product that is specifically made for protective braids or your hair type and focus on the roots. Do this step after every washing session. After you do your wet treatments, it is important to ensure your hair dries properly to avoid mold or mildew on your natural hair shaft. Always dab excess moisture out from the braids and roots. In humid or cold weather conditions, you may use a blow dryer at the lowest temperature to dry your braids, otherwise, simply air dry. Hydration or moisturization is a necessary step to ensure your hair does not dry out between washes and your hair continues to grow healthily. Get a good-quality, lightweight leave-in moisturizing spray or oils and apply it 2-3 times a week as per package instructions. Besides these major maintenance steps, here are a few other tips you can follow to ensure your braids continue to look fresh and neat while they last.
Avoid pulling or tugging at the braid. Stitch braids tend to be heavy because of the stitched-in extensions, so discuss how tight you want them to be with your stylist beforehand. Wear a satin or silk bonnet to bed every night to protect them while you sleep. It will help avoid frizz and damage from rubbing against rough fabrics. Avoid heavy styling products to prevent buildup and weighing down of braids that will eventually loosen and also weaken your hair roots. Get touch-ups if you notice your braids have started loosening or unraveling to ensure they look tight, fresh, and shiny.
These tips are basic and easy to follow. Set yourself a good haircare regime and schedule so you can make the best out of your stitch braids. What is the best hair for braiding stitch braids? The best hair extensions for stitch braids vary as per individual styling and budget requirements. Some popular hair extension type choices include human hair, Afrelle, Kanekalon, and Xpression. What is the difference between stitch braids and feed-in braids? In stitch braid, there is a unique sectioning technique done using rubberbands or comb and fingers, while adding extensions, to make it appear like stitches. Feed-in braiding requires adding extensions as you continue braiding but does not focus on the stitch-like sectioning. If you are a beginner at protective braiding, you might find a visual guide more helpful to grasp the tiny details of the technique. Check out the following video where a stylist demonstrates how to do stitch braids the traditional way.